

Table of Contents
- Essential Hand Tools Every Locksmith Carries Daily
- Building a Professional Lock Pick Set That Fits Your Belt
- How to Organize Locksmith Tools for Maximum Efficiency
- Locksmith EDC Gear: What Belongs in Your Pockets and Pouches
- Weight Distribution and Ergonomics for a Locksmith Tool Belt
- Customizing Your Locksmith Tool Belt Setup
- Frequently Asked Questions
Last Updated: September 20, 2026
Essential Hand Tools Every Locksmith Carries Daily
A professional locksmith tool belt essentials kit starts with a core group of hand tools that handle most field calls. According to the Occupational Safety and Health Administration's hand tool guidance, choosing the right tool for each task matters more than carrying everything you own. Dyno Kwick Pick has been trusted by locksmiths for over 25 years.
Most service calls break down into a few repeat jobs: measuring, cutting, prying, fastening, and, the part generic tool guides skip, servicing the lock cylinder itself. Your belt should cover all five without weighing you down.
The Locksmith-Specific Core
These are the tools that separate a locksmith's belt from a carpenter's. They are the ones most general tool-belt articles never mention:
- Plug followers in two or three diameters (commonly sized for standard 5- and 6-pin cylinders) to keep pins from spilling when you pull a plug
- Pinning kit with a pinning mat or tray, tweezers, and a plug holder for rekeying on site
- Cylinder removal tools, a cylinder wrench or a spanner-style tool sized for the mortise and rim cylinders you see most often
- Shim picks (thin metal shims) for opening latched knobs and for freeing stuck cylinders without drilling
- Allen and Torx drivers in the small sizes used by lever handles, deadbolt collars, and commercial exit devices
- A small hammer and a brass or plastic punch for drifting hinge pins and setting cylinders without marring finishes
- A plug spinner for fast re-pinning when a cylinder is already picked
The General Hand Tools That Still Earn Their Spot
You still need the everyday tools that handle the door, not just the lock:
- Tape measure (25-foot, auto-lock)
- Speed square for quick angle checks on frames and strike plates
- Carpenter pencil and fine marker
- Utility knife with replaceable blades
- Needle-nose pliers and adjustable wrench
- Screwdrivers in Phillips and flathead, plus a stubby for tight recesses
- Nail set and cat's paw for stubborn hardware
- Flat bar for prying door frames
The trick is picking tools that do double duty. A flat bar can pry and lift. A speed square can mark and check alignment. A plug follower can double as a drift for light tapping. Build the belt around the locksmith-specific tools first, then fill the remaining pouches with the general tools that support them.
Measuring and Marking Tools
Precision starts before you touch a lock. A tape measure and speed square let you check door gaps, frame depth, and strike plate alignment in seconds. A carpenter pencil marks metal and wood without smearing.
For lock work specifically, add a backset gauge or a small ruler to confirm the 2-3/8-inch or 2-3/4-inch backset before you quote a replacement. Getting that number wrong is one of the most common reasons a job takes two trips.
Keep these within easy reach. You'll grab them on nearly every call.
Cutting, Trimming, and Prying Implements
A utility knife handles trim, weatherstripping, and packaging. A flat bar and cat's paw pull nails and pry frames when a door swells or shifts. A hacksaw with a fine-tooth blade cuts through a seized deadbolt or a stripped cylinder when extraction is the only option left.
Match the tool to the material. Prying aluminum with a steel bar can dent the frame. Cutting a hardened steel bolt with a wood blade wastes time and dulls the blade.
Building a Professional Lock Pick Set That Fits Your Belt
A professional lock pick set should match the locks you actually encounter, not the biggest kit on the shelf. Many locksmiths carry a slim pick set plus one reliable everyday tool rather than a bulky case.
The National Institute of Standards and Technology publishes security and access-control standards that shape how locks are built, which is why your picks need to match real hardware, not theory.
For a belt-friendly setup, focus on:
- Tension wrenches in two or three thicknesses
- A short hook and a rake for common pin tumbler locks
- A pen-style pick tool for discreet, fast work
- A small case that clips to your belt loop
The pen-style approach is where Dyno Kwick Pick fits in. Its 3-in-1 design keeps a pick, a tension tool, and a durable body in one pocket-sized unit.
How to Organize Locksmith Tools for Maximum Efficiency
Learning how to organize locksmith tools comes down to reach and repetition. Put the tools you use most on your dominant-hand side and the rest out of the way.
A simple method that works:
- Track which tools you grab on ten straight calls.
- Move the top three to your front pouches.
- Shift rarely used tools to a back pouch or bag.
- Recheck the layout every month.
This keeps your load-bearing setup lean. It also cuts the time you spend digging.
Locksmith EDC Gear: What Belongs in Your Pockets and Pouches
Locksmith EDC gear covers the small items you want on your body at all times. These are separate from your main belt tools.
A practical everyday carry list:
- A pen-style pick tool for quick jobs
- A compact flashlight
- A multi-bit screwdriver
- Nitrile gloves
- A small notepad and marker
- A phone or tablet for job details
The accessibility of each item matters. If you can't reach it with one hand, it slows you down.
Digital tool integration is the newer piece here.
Weight Distribution and Ergonomics for a Locksmith Tool Belt
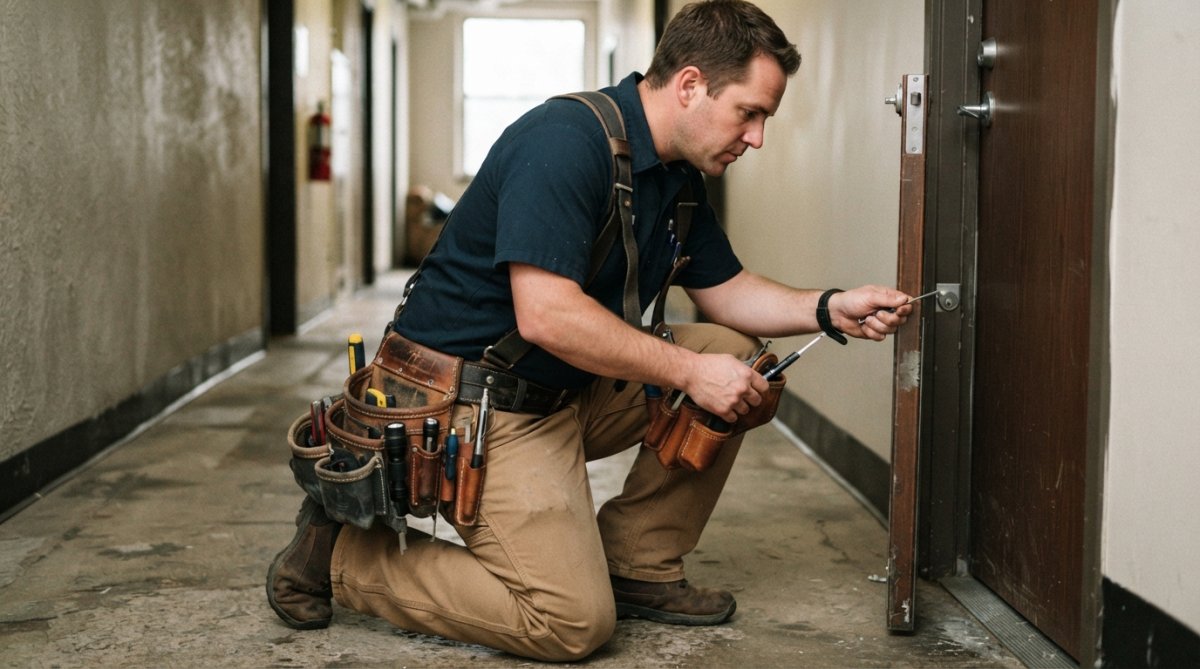
A heavy belt worn the wrong way causes back and hip pain over time. Proper weight distribution and ergonomics keep you working without long-term injury. This is the part most tool-belt guides skip: they tell you what to carry, not what carrying it for 20 years does to your body.
The Career-Length View
Most practitioners find that the wear-and-tear shows up gradually, a stiff lower back after a long day, then a nagging hip, then a shoulder that aches from a one-sided belt. The fix is not one habit but a system you build early and keep for your whole career.
A few habits that help:
- Use a suspender system to move weight off your hips and onto your shoulders, where the body tolerates load better
- Balance heavy tools on both sides of the belt so you are not leaning to compensate
- Keep the belt snug, not tight, a belt that digs in restricts movement and circulation
- Kneel on a pad instead of one knee, and switch knees between jobs
- Stretch between jobs, especially hip flexors and lower back
- Keep total belt weight down by moving rarely used tools to a bag
Load Placement Matters More Than Total Weight
Where a tool sits changes how much it costs you. A pouch at the front of the hip is easy to reach and close to your center of gravity. A pouch at the back forces a twist every time you reach for it. Over a career, that repeated twist is the motion most likely to cause trouble.
Signs You Need to Change Your Setup
Your body gives you signals before an injury becomes chronic. Watch for:
- Aching that lasts past the end of the workday
- Numbness or tingling in the hands or fingers
- One shoulder or hip that feels tighter than the other
- Fatigue that shows up earlier in the day than it used to
Customizing Your Locksmith Tool Belt Setup
Customizing your setup means matching the belt to your body and your work. No two locksmiths carry the same load.
Then tune the details:
- Pouch configuration: front for speed, back for bulk
- Belt loop and holster placement for your dominant hand
- Quick-release buckles for fast on and off
- Customization of each pouch for your top tools
Frequently Asked Questions
What are the essential tools every locksmith should carry in a tool belt?
A working locksmith tool belt typically holds a tape measure, speed square, utility knife, screwdrivers, needle-nose pliers, an adjustable wrench, a nail set, and a cat's paw or flat bar for prying. Add your professional lock pick set, tension wrenches, and a pen-style pick for quick access. Keep a carpenter pencil and marking tools in a front pouch so you are not digging for them mid-job. The goal is a belt that covers measuring, cutting, fastening, and picking without weighing you down.
How do you organize a professional locksmith tool belt for maximum efficiency?
Start by grouping tools by task: measuring and marking on one side, cutting and prying on the other, and picks and tension wrenches in a dedicated holster near your dominant hand. Use quick-release clips so you can swap pouches between jobs. Keep the heaviest items closest to your spine to reduce strain, and reserve front pouches for tools you grab every few minutes. A consistent layout means your hand goes to the right spot without looking.
Are pen-style lock picks better for field work than traditional pick sets?
Pen-style picks shine in field work because they fit in a shirt pocket or small belt holster without announcing themselves. For locksmiths who need to move fast between service calls, a pen-style 3-in-1 tool covers picking and tension in one unit, which cuts down on fumbling. Traditional pick sets offer a wide range of hook and rake profiles for different cylinders. Many pros carry both: a full set in the bag and a pen-style tool on the belt.
How do you balance weight and accessibility in a locksmith tool belt?
Load-bearing comfort comes down to three things: suspenders, pouch placement, and trimming what you carry. Suspenders transfer weight from your hips to your shoulders, which matters when you are on a belt for eight hours. Place heavy tools like adjustable wrenches and pry bars at the back, and keep frequently used items like your pick holster and tape measure within arm's reach. Audit your belt weekly and remove anything you have not touched in a month.
0 comments