

Last Updated: November 2, 2026
Quick Summary
An ergonomic locksmith tool belt keeps tools fast to reach and your body comfortable. Choose a compact belt with padding and a quick-release buckle, arrange pockets by how often you reach for each tool, and keep the load balanced close to your center line. Test the setup by crouching and reaching before a real call.
- Choose a compact belt with four to six purpose-built pockets over a wide, overloaded one.
- Place heavy items just behind the hip bones, close to your center line.
- Split the load by task, with dominant-hand tools on one side and support tools on the other.
- Suspenders move belt weight onto the shoulders and reduce hip pressure on long days.
- Test a new belt with tools loaded by crouching, reaching and walking stairs.
Table of Contents
- Why Your Tool Belt Setup Matters on Every Service Call
- Choosing the Right Belt for Locksmith Work
- Locksmith Tool Belt Setup: Organizing Pockets for Fast Access
- Tool Belt Weight Distribution: Balancing the Load
- Tool Belt Back Pain Prevention for Long Days in the Field
- Tool Belt vs Tool Bag for Locksmiths: Which Fits Your Work
- Testing and Adjusting Your Setup Before Your Next Call
- Frequently Asked Questions
Why Your Tool Belt Setup Matters on Every Service Call
A poorly set up tool belt slows you down before you even reach the door.
Most locksmiths carry their tools the same way they started out. They grab whatever belt was cheapest and fill every pocket they can find.
The fix is not complicated. It comes down to three things: choosing the right belt, organizing your pockets around how you actually work, and balancing the load so no single side pulls you off center.
- Fast access saves seconds on every lockout
- A balanced load reduces strain on your back and hips
- A clean layout cuts down on dropped tools and lost time
Choosing the Right Belt for Locksmith Work
A locksmith belt has to do two jobs at once: hold a compact set of precision tools where your hand can find them without looking, and stay comfortable through repeated crouching, kneeling, and reaching into door frames and vehicle interiors. A belt that works for a carpenter or an electrician is often the wrong shape for locksmith work because the tool load is lighter but the reach pattern is more repetitive.
Start with these selection criteria, then test them against the kind of calls you actually run.
- Padding and contour: Padded or contoured belts reduce pressure points at the hip bones during long kneel-and-stand cycles. Breathable spacer mesh or ventilated foam matters in warm vans and unconditioned entryways; solid foam padding traps heat.
- Buckle type: A quick-release side-release buckle lets you drop the belt fast when you need to squeeze behind a door or under a dash. A cam or friction buckle holds adjustment better under load but is slower to remove. Many field locksmiths prefer a side-release buckle with a secondary strap keeper so the belt does not creep loose during repeated crouching.
- Suspenders: If your loaded belt weighs more than a few pounds, suspenders transfer load off the hips and onto the shoulders. This is the single most effective upgrade for locksmiths who feel hip pressure or lower-back fatigue by mid-day. Look for suspenders that clip to the belt rather than a separate harness so you can remove the belt without unclipping everything.
Match the belt to the work environment:
- Residential and mobile lockouts: A compact belt or a single pouch on a 2-inch belt is usually enough. You need picks, tension tools, a plug spinner, a key gauge, and a small screwdriver set. Bulk gets in the way in tight entryways.
- Commercial and institutional work: More hardware means more tools. A belt with a dedicated driver pocket and a small parts pouch for pins and springs works better than a single general-purpose pouch.
- Automotive work: Reach patterns are different because you are often leaning into a door or working at bumper height. A belt that rides lower and has a flat profile reduces snagging on door frames and seats. Some locksmiths switch to a compact pouch or a small case for automotive calls because a full belt catches on interior trim.
Fit and adjustment matter as much as the belt itself. Put the belt on with your typical load, then check these points:
- The belt should sit on or just above the hip bones, not on the soft waist. If it slides down when you crouch, it is too loose or the load is too heavy for the belt width.
- You should be able to slide a flat hand under the belt at the front. If you cannot, it is too tight and will restrict breathing and forward bending.
- The buckle should sit slightly off-center so it does not dig into your stomach when you lean forward.
- Pouches should sit at or behind the hip line, not in front of the thighs, so they do not collide with your hands when you kneel.
Finally, inspect the belt before you buy or before a busy week. Check stitching at pouch attachment points, buckle teeth or cam surfaces, and any rivets or D-rings. Locksmith tools are small but dense, and a pouch seam that fails mid-call scatters picks and tension tools where you cannot find them. Replace worn pouches rather than repairing them with tape, which adds bulk and catches on clothing.
Locksmith Tool Belt Setup: Organizing Pockets for Fast Access
Your pocket layout should match the order you reach for tools on a typical call. Put the items you use most often where your hand can grab them without looking. Our must-have lock picking accessories for daily carry covers which essentials are worth keeping on you every day.
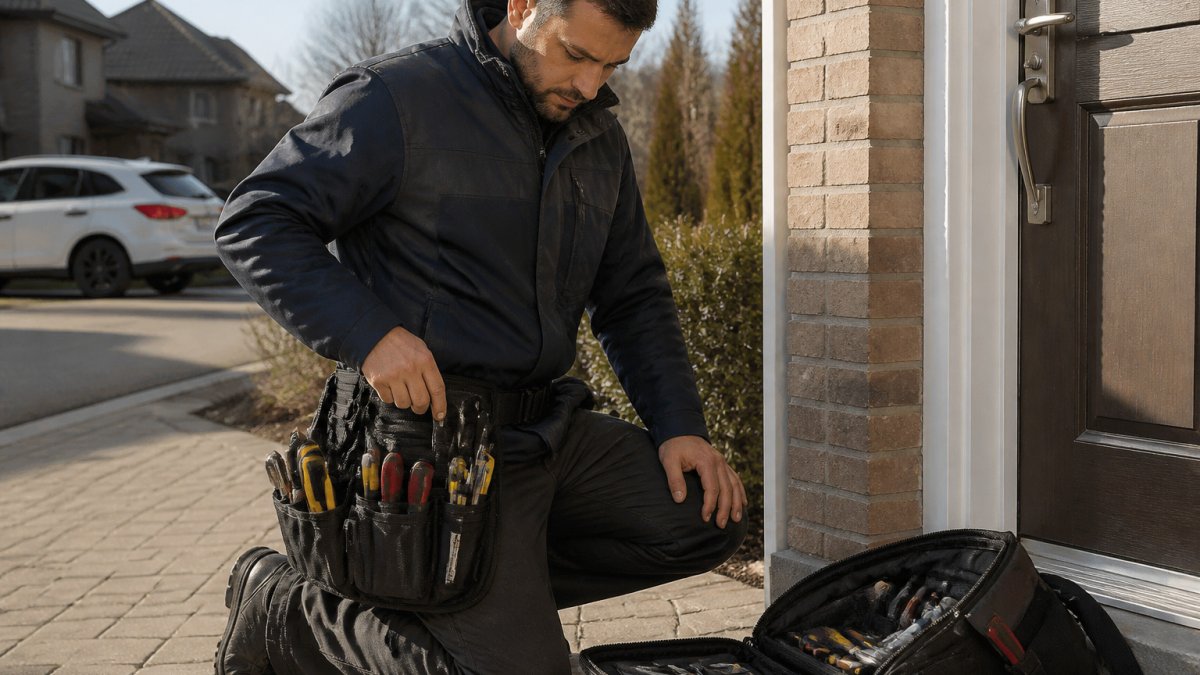
A simple layout that works for many locksmiths:
- Front pouches: pick sets and tension tools you use on almost every job
- Side pockets: small hand tools and spare pins
- Back pockets: items you rarely need, like spare cylinders or extra lubricant
Keep the same item in the same spot every time. Muscle memory will do the rest.
Tool Belt Weight Distribution: Balancing the Load
The mechanism is straightforward. A loaded pouch acts as a lever arm on your pelvis.
Use this adjustment protocol before your next shift:
- Weigh the loaded belt. A typical locksmith belt with picks, tension tools, a plug spinner, a key gauge, and a small driver set often lands in the 2-to-4-pound range. If yours is heavier, look for tools you can move to a van bag or a compact case.
- Place the heaviest items closest to your center line. A plug spinner or a dense driver set should sit just behind the hip bones, not out at the side of the belt. Moving a heavy item a few inches inward reduces the lever effect noticeably.
- Split left and right by task, not by symmetry. Instead of mirroring identical pouches on both sides, put the tools you reach for with your dominant hand on that side and the support tools (tension tools, spare pins, a small flashlight) on the other. This keeps your reach pattern natural and still balances the load.
- Alternate sides during the day. If your layout forces most reaches to one side, deliberately switch the belt orientation or move a pouch to the opposite side for a few calls. Alternating reduces repetitive strain on one shoulder and hip.
- Check the belt line in a mirror or on video. A belt that sags in front pulls your posture forward. A belt that rides up in back usually means the rear pouches are too heavy or too far from the body. Adjust pouch position before you adjust the belt tension.
Load distribution also interacts with posture and breaks. Two habits make a bigger difference than any single belt adjustment:
- Bend at the knees and keep the load close. When you kneel to work a lower lock, the belt should stay against your body rather than swinging forward. A belt that swings forward adds momentum every time you stand up.
- Take a load-off break every hour or two. Remove the belt when you are in the van between calls, even for a few minutes. Standing tall and rolling your shoulders resets the muscles that have been holding the belt in place.
For locksmiths who regularly carry a heavier kit, suspenders are the most direct way to redistribute load off the hips.
Finally, treat load distribution as a task-specific decision rather than a fixed setup.
The table below summarises the adjustment steps for balancing a locksmith tool belt.
| Step | What to do | Note |
|---|---|---|
| 1. Weigh the belt | Check loaded weight | Typical kit is 2-4 pounds |
| 2. Place heavy items | Move them near the center line | Just behind the hip bones |
| 3. Split sides | Balance by task, not symmetry | Dominant-hand tools on one side |
| 4. Alternate sides | Switch orientation or pouches | Reduces repetitive strain |
| 5. Check the belt line | Use a mirror or video | Adjust pouches before tension |
Tool Belt Back Pain Prevention for Long Days in the Field
Back pain builds slowly. Small habits make the biggest difference over a long week of calls.
- Bend at the knees, not the waist, when you reach for a tool on the ground
- Take a short break to stand tall and roll your shoulders every hour or two
- Remove heavy items from the belt when you sit in the van for long stretches
Many locksmiths also find that a lighter kit on easy jobs reduces fatigue for the whole day. Carry only what each call needs.
Tool Belt vs Tool Bag for Locksmiths: Which Fits Your Work
A belt keeps tools close and hands free. A bag holds more and suits jobs where you need many larger tools at once.
- Choose a belt if most of your work is quick residential or automotive calls
- Choose a bag if you regularly carry bulky equipment or work at a fixed site
- Use both if your work mixes fast calls with heavier jobs
Most field locksmiths end up with a belt for the daily kit and a bag or case in the van for everything else. If you are deciding which tools suit maintenance-type work, see lock picking tools for maintenance technicians.
Testing and Adjusting Your Setup Before Your Next Call
Before your next real job, test your setup at home. Practice reaching each pouch with your eyes closed. Walk a few laps. Crouch and stand several times.
Make small changes until the belt feels natural. To check your tools on a simple test, you can practice on how to pick simple cabinet locks: a step-by-step guide.
Once your layout feels right, a pen-style 3-in-1 lock pick tool such as the Dyno Kwick Pick can be considered for the front pouch.
Frequently Asked Questions
How should a locksmith organize a tool belt?
Arrange tools by how often you reach for them. Keep picks, tension tools and your most-used pen-style tool in the front pockets at hip height, where your hand falls naturally without looking. Place less frequent items such as shims, extra tension wrenches and spare cylinder tools toward the back or in a rear pouch. Group similar tools together so you can find them by feel, and keep sharp or fragile items in closed pouches to protect both the tools and your hands during fast movements on a job.
What tools should a locksmith carry on a tool belt?
Carry the tools you use on nearly every call: a pen-style lock pick tool, a set of hand picks, tension tools and a small flashlight. Add a few task-specific items you reach for regularly, like a door wedge or a small set of key tools. Leave heavy or rarely used equipment in your vehicle. A lean belt that holds only what you need for the job at hand keeps the load manageable and speeds up access, which matters most on residential and automotive calls.
How can I make a tool belt more comfortable?
Start with a belt that fits your waist snugly so the weight rests on your hips rather than your lower back. Adjust the buckle so the belt sits level, and check that pouches do not press into your thighs when you bend or kneel. Padded or contoured belts reduce pressure points on long days. Empty and reposition pouches every few weeks, since shifting tools to better positions often makes a noticeable difference in comfort.
How do you balance weight on a tool belt?
Distribute weight evenly from side to side and keep heavier items close to your body, centered over your hips. Avoid loading one side heavily, because that pulls your posture off balance and strains one hip and the lower back. Place the heaviest pieces in pouches nearest your center line. Weigh your loaded belt occasionally and remove anything you have not touched in several jobs.

0 comments